Well into 2020!
Hello Everyone,
It is January 18th but recovery from the holidays is still ongoing. The recovery will need
to wrap up very soon as next Tuesday a new semester begins. I wanted to get a
post in before I am completely caught up with other tasks. Some crafting
activity has been ongoing due to holiday gifting. A little bit of everything
has been the order the last month or so with sketching, framing/matting, vinyl
cutting, and sewing.
The first project I would like to share with you is the
creation of a few polar bear stickers. As with the best of projects, it started
with putting pencil to paper with sketches:
The ideas that spawned the sketches are not completely original, as I looked at others from searches, but with the reworking, I feel they are original now. The sketches were then sketched in Adobe
Illustrator into files that were friendly to the Silhouette Portrait 2 vinyl
cutter at The Workshop of the Cook Memorial Library.
Here is the final product with the Silhouette Portrait 2. I know the first doesn’t look
like much, but it is tricky to take a photo of a white sticker on a white
background. I thought the silver one came out spectacular.
When the recipient is ready to use the
stickers, the protective sheet is pulled first and then the vinyl can be used
as any other sticker.
The current adventure has been a quilted oven mitt. Much
time has gone into this project though it probably doesn’t look like it 😊.
The instructions and pattern were sourced from this book.
I like this book because the projects, techniques, and
styles have a very wide range. Because there are so many projects, the
instructions are short for each project so if you need more guidance it is
probably not the best choice. After going through the possibilities of already
owned fabric, I chose these.
After cutting the fabric, the next part was to put pencil to
paper and enlarge the bird motif. Yes another sketch.
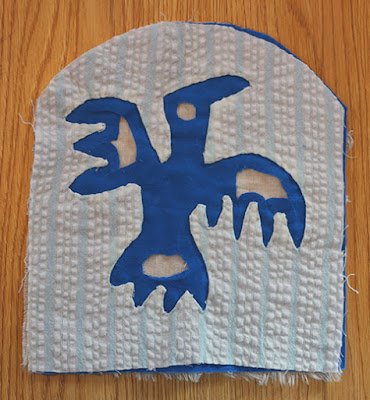
Then it was time to trace this motif on the fabric. This
motif will be going on the outer hand part of the mitts and will have three
layers of fabric: the striped seersucker, the blue, and a cream.
The three layers were then stabilized by doing a rough
outline of the bird with thread. Once stabilized, the top layer only was cut in
the shape of the bird.
To finish the cut edges, a tiny amount of fabric was rolled
over and then hemmed by hand. The first one I pinned to the maximum and then
pressed. The second one I did it with no pins and pressing. I would say that
both ways were challenging, there is no easy shortcut.
You see a finished first layer to the left, but it is never
really finished is it? I am on the step where you cut the blue fabric only to
show the cream in parts.
Fun and not too challenging, but very tedious.
Unfortunately, progress this week was delayed due to a nasty
cough I am pretty sure is associated with my sinuses getting out of balance. I
have a feeling, that 2019 holiday gift creating is going to be ongoing well
into 2020. Until next time…


Comments
Post a Comment